
Preserving Children's Artwork — by Guest Mom Carrie Lundell

Who doesn't love their child's drawings? Many children express themselves through art far better than the written or even spoken word, so the attachment is understandable. Yet who among us hasn't thought about chucking every last piece of art when the pile coming home from school, added to what is created at home, threatens to take over every inch of the refrigerator door and fill every drawer in the house?
Here's the million-dollar question: what is worth keeping and what gets tossed (during the night and placed in the outside garbage under mounds of food scraps so there is no evidence of the cruel mommy who doesn't think every piece of her child's art is beautiful and worth saving)? Here's what I do:

1. Display the Art
Even for just a day. If your child is proud of their artwork, show it off. Right now, we use simple magnet clips on the side of the fridge. For a cleaner presentation, this company produces frames that open on hinges, allowing you to swap out your child's art easily and often. Just last week I came upon this ingenious DIY frame with the same purpose and I like it even more. A cute little clothesline like this works famously too.
2. You Save, I Save
Each of my children gets their own "treasure box." They are allowed to keep anything they want in their box, but it must fit in the box. New art often replaces old art in their boxes as they constantly work to make sure the lid stays on the box. I also have my own acid-free "treasure box" for each of them and hold myself to the same rule — I can't save more than what will fit in the box. I save only the most special drawings. They are usually the ones with good stories attached, or where it's obvious my child has spent more than her usual attention span, and I always save "firsts". Like the first time my child drew a circle with arms growing out of the sides and called it "mom" instead of the typical scribbles.

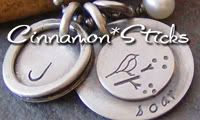
3. Preserve with a (re)Purpose
Preserving your child's art in an acid-free box is one thing, but using it as inspiration to create something else takes preservation to a whole new level. My children love seeing their art come to life as "softies", handkerchief embroidery, carved pumpkins, personalized neckties, t-shirt transfers, and Christmas ornaments. I will admit the time I spend creating with their art might partly be my way of making up for the fact that I throw the majority of their artwork in the trash. If sewing is not your thing, this company creates sterling silver pins out of your child's art and this shop will turn their art into a sweet little pendant, both perfect for gifting.

Whatever you decide to save, make sure to write the child’s name and date on it.Also, remember to record and attach “the story” if it has one. It's all going to be vital information down the road. You always think you’ll remember, but you won’t.
Thanks to Gabrielle for having me here this week. I’ve had a great time sharing with all of you! I hope you’ll take the time to create, preserve and share your family heirlooms.
Labels: guest mom, kids, make something
posted by Gabrielle of Design Mom at Monday, October 12, 2009
![]()
![]()


23 Comments:
GREAT ideas! Can you share the link for the do-it-yourself frame? Thanks!
Aurora
AAAACK!! Can't believe I forgot to include that link. I even used her picture! Here it is for now and hopefully Gabrielle can add it into the post:
DIY Art Display
I ADORE the dolls you made. You're a very clever mama Carrie.
How do you save the "story" associated with the various pieces.
Brilliant!!!
Carrie - I love this post. I am a completely lame sewer but would love to learn to make those Xmas ornaments, especially with DD being 18 months old and there being no way this year I can do a tree with any fragile or beautiful ornaments (that I don't want her destroying or putting in her mouth). And I think I'm going to order some of those art hooks to string across my kids room now that DS in in preschool and is bringing home so much artwork. Thanks for that link.
I'm a fan of taking digital photos of the artwork I'm throwing out. It really helps with the guilt of not keeping everything, which I most decidedly don't.
My favorite thing from this post is the Christmas ornaments. I say it every year, but THIS is the year that I am going to do that :) Thanks for the reminder and thanks for being such a fabulous guest mom this past week - it was truly inspiring having you here at Design Mom!
Can you tell us how to do the Christmas ornaments? I love them!
oh, that softie is the cutest thing ever! The ornaments are great too! They look simple to make too, which is always a plus in my book. Thanks for the great post.
I keep some and frame some, but I also scan the best ones and keep them on my hard drive. Every year we make a photo book on iPhoto with pictures we've taken of each child and include that year's artwork as well.
Laurie
Carrie, I love the doll and the christmas ornaments are so cute. Did you know Gabrielle at BYU? I remember you from Fashion Design classes. So fun to see you as a mother!
I don't have kids, but I have nieces and nephews - these are some great projects to help them make for parents/grandparents. Love this post!
Generally, if a 5 year old can do it, I can almost swing it. :)
Petit Elefant - Thank you! Interpreting drawings into dolls is very fun. I usually let them go through my stash to pick the fabrics.
Angela - If it is possible, I just write it on the back. Doesn't have to be long and complicated. It's even just a title most of the time.
Lauren - Glad you are inspired!
Beth - You can totally do the ornaments. They take basic, basic sewing skills. Even you little one can scribble on fabric with christmas colors and you can cut out a shape for the ornament yourself like a start or a circle. We have a few of those and they are cute too.
HTown Jenny and Laurie - Yes, scanning and saving on your computer and using services to print out books are also great ways to get rid of the clutter and save the art as memories.
Chloe - Make the ornaments this year!
Amy - I will add another comment to give you the quick tips on making the ornaments.
Katy - The ornaments can be as simple or as complex as you want them to be. You could even mount paper drawings on tagboard, add a ribbon loop to the top and Viola! No sewing required.
Mauri - No, Gabrielle and I didn't know each other at BYU, but I remember you! Man, it's been a long time!
This comment has been removed by the author.
Ornament Instructions:
Have your child draw pictures on fabric using fabric markers. To make it easier, stretch fabric in embroidery hoops or iron on freezer paper to create a temporary stiffener.
Roughly cut out fabric drawings with another layer of fabric (for the back). I use a nice christmas print or felt.
Sew two layers together around the drawing, inserting a ribbon loop at the top and leaving a 2' opening at the bottom.
Stuff ornament using cotton or poly fill.
Sew up opening.
Trim edges 1/4" from stitching using pinking shears.
**Remember to add child's name and year somewhere on the ornament!
Hang on tree or use as gift tag.
Enjoy!
Another awesome way to display something like this is Magnetic Paint. You can put it up in the mud room or even in your kids room. Where you can paint over it with the color the rest of the room is painted in. Only down side is that the surface of the wall isn't smooth. But think about all the pictures you can display!
love preserving my kids artwork too! we also turn their art into notecards & holiday cards for our friends & family. a few years ago, my son designed our holiday card with a huge christmas tree & created each family member as crab ornaments on the tree (dad had glasses, I had earrings, etc). he had written merry christmas from the crabtree's. everyone loved the "crab"tree card so much that we created our own christmas "crab"tree with crab ornaments that have been gifts from friends & family. it has become my kids favorite holiday decoration.
What a fantastic post. I'm bookmarking it :)
Hello:)
I also made a post about preserving your artwork and add two ideas to your fantastic list, laminated to hanging his drawings and embroidery it on their clothes. You can see here: http://dalleuncolinho.blogspot.com/2009/08/gardar-as-suas-obras-de-arte-i.html
Congratulations for this fantastic post.
Cheers from Spain :)
i LOVE it!
Great ideas and I wanted to share one of my own. As my kids bring art home, I scan our favorites (or I take a digital pix of the large pieces that don't fit on the scanner)and then I name them with a quick story (ie Mom's heart, self-portrait, me and dad, the ugly bird... and the date). Each child gets a folder on my desktop (that gets backed up nightly, of course). The best part of this process is every 2 years I create a 12x12 hard-cover coffee table book of their artwork that has a volume number and date, one for each child. During this time of year sites like photoworks, kodak and my publisher have BOGO sales so I get one for display and one is put away for safe keeping for about $50.00 for two. The books are full color with the caption and date and they look glorious! A day doens't go by that a family member, a neighbor or a friend takes a moment to flip thorugh the book. When they're grown, they'll be great keepsakes and it makes all the art look so important. While you're at it, it's also easy to make inexpensive mini flip books for grandparents...less than $15 each. It sounds harder than it is...if you take 15 minutes each week to scan and organzie your favorites and then plan for a a few hours each November (or every other like we do), you'll have those little memories preserved for a lifetime! The cost may be a deterrent to some but you could also make softcover books for about 1/2 the cost.
Photographing and scanning are the way to go as far as I'm concerned...I'm so convinced that this is the way to save your kid's art that I started a company digitizing children's art and making gorgeous coffee table books that you'll enjoy for generations to come! It's a time consuming job so if you need someone to do it for you, call us. Visit our website, www.souvenartebooks.com to see our beautiful product.
Post a Comment
<< Home